Getting Started
The following walkthrough will help you get up and running with building and running your first workflow template. By the end of this walkthrough, you will have a solid foundation in the basics of iterative workflow template development.
Note
Workflows developed in this way work across both Ecoscope Desktop and Ecoscope Web. However, custom workflows on Ecoscope Web are not yet supported for general contribution. The development process described here is uniform regardless of the target platform.
Prerequisites
-
First, install
pixiif you do not have it already. -
Then, install
wt-compiler:Note on
--run-post-link-scriptsThe
--run-post-link-scriptsflag is necessary because, in order to generate a visual representation of the workflow DAG, thewt-compiler compilecommand depends on thedotexecutable having been initialized post-install via thedot -ccommand. Setting the--run-post-link-scriptsflag triggers this initialization automatically. Setting this flag does imply allowing the package manager to run (potentially insecure) arbitrary scripts. If you prefer to omit this flag, then after you have installedwt-compiler, you may separately run$HOME/.pixi/envs/wt-compiler/bin/dot -cto initializedot. -
Third, install the Ecoscope Wizard Providers plugin for
wt-compiler: -
Finally, download and install the Ecoscope Desktop App if you do not have it already.
Step 1 — Scaffold a new workflow
In a clean directory on your machine, run:
From the selection of Ecoscope wizard providers presented to you interactively, choose ecoscope-events-map-example (ecoscope-wizard-providers).
Your workflow will be created under the file path you specified as the workflow id in the interactive wizard. So if you used the id my_first_workflow, then you would see:
$ ls -a1 my_first_workflow
.
..
.gitattributes
.github
.gitignore
layout.json
LICENSE
README.md
spec.yaml
test-cases.yaml
Step 2 — Compile the scaffold into a workflow template
From the new directory, compile:
$ cd my_first_workflow
$ wt-compiler compile \
    --spec=spec.yaml \
    --pkg-name-prefix=ecoscope-workflows \
    --results-env-var=ECOSCOPE_WORKFLOWS_RESULTS \
    --install
You will now see a new folder in the template directory containing the compiled workflow:
$ ls -a1 ecoscope-workflows-my-first-workflow-workflow
.
..
Dockerfile
.dockerignore
ecoscope_workflows_my_first_workflow_workflow
graph.png
.pixi
pixi.lock
pixi.toml
README.md
tests
VERSION.yaml
Step 3 — Load the template into Ecoscope Desktop
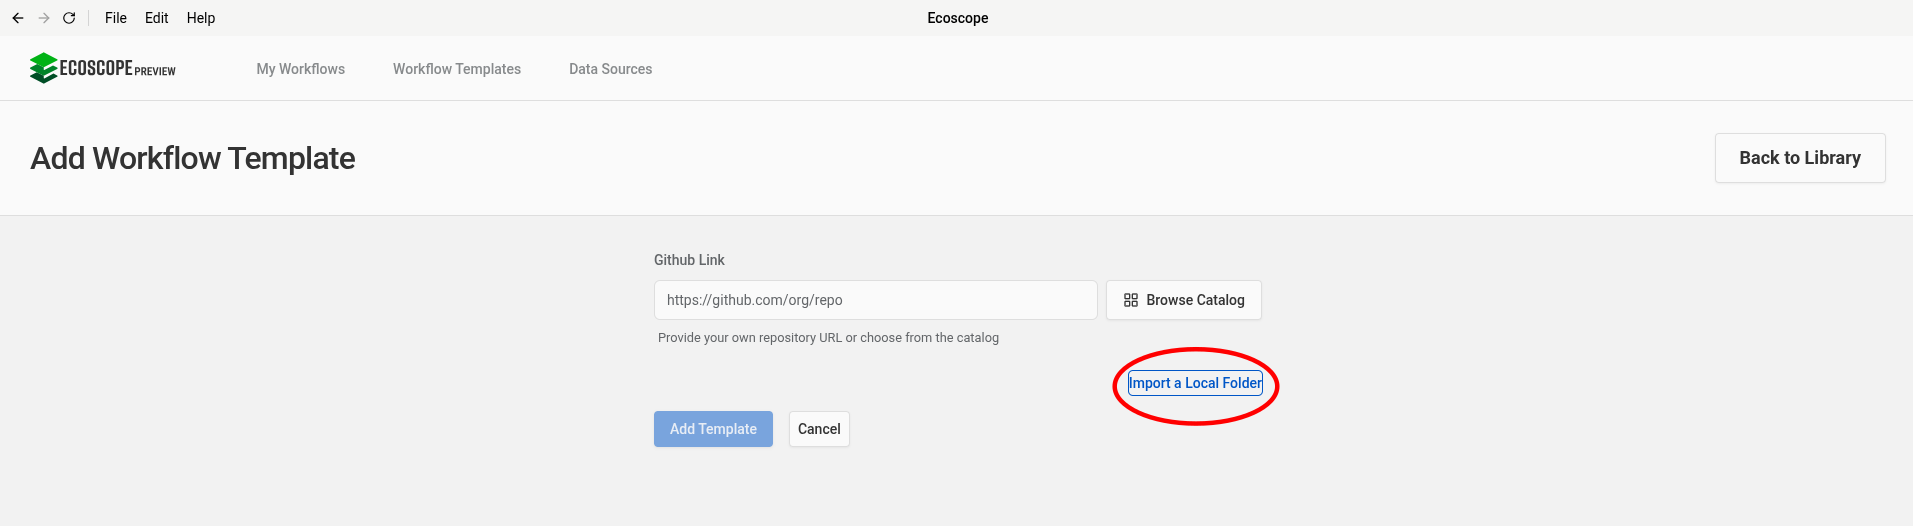
Open Ecoscope Desktop and navigate to the Templates screen. You will see a list of any templates you have already imported, plus options to add new ones.
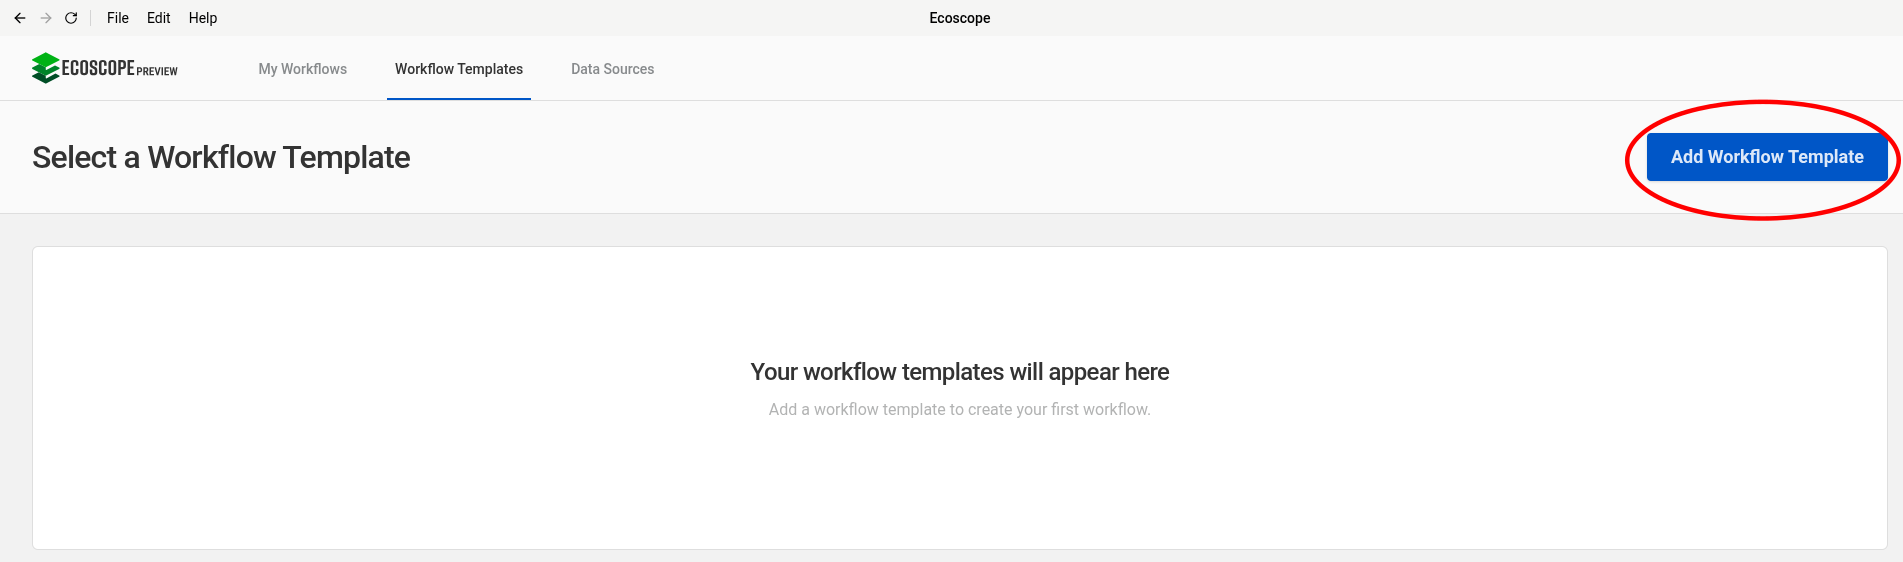
Click Import Local Folder and select the my_first_workflow folder (the root, not the compiled subdirectory). The template will be validated and added to the templates available to select in the Workflow Templates page.
Step 4 — Configure and run a workflow
Set up an EarthRanger data source
Before running the workflow, you need to configure a data source. Navigate to the Data Sources screen.
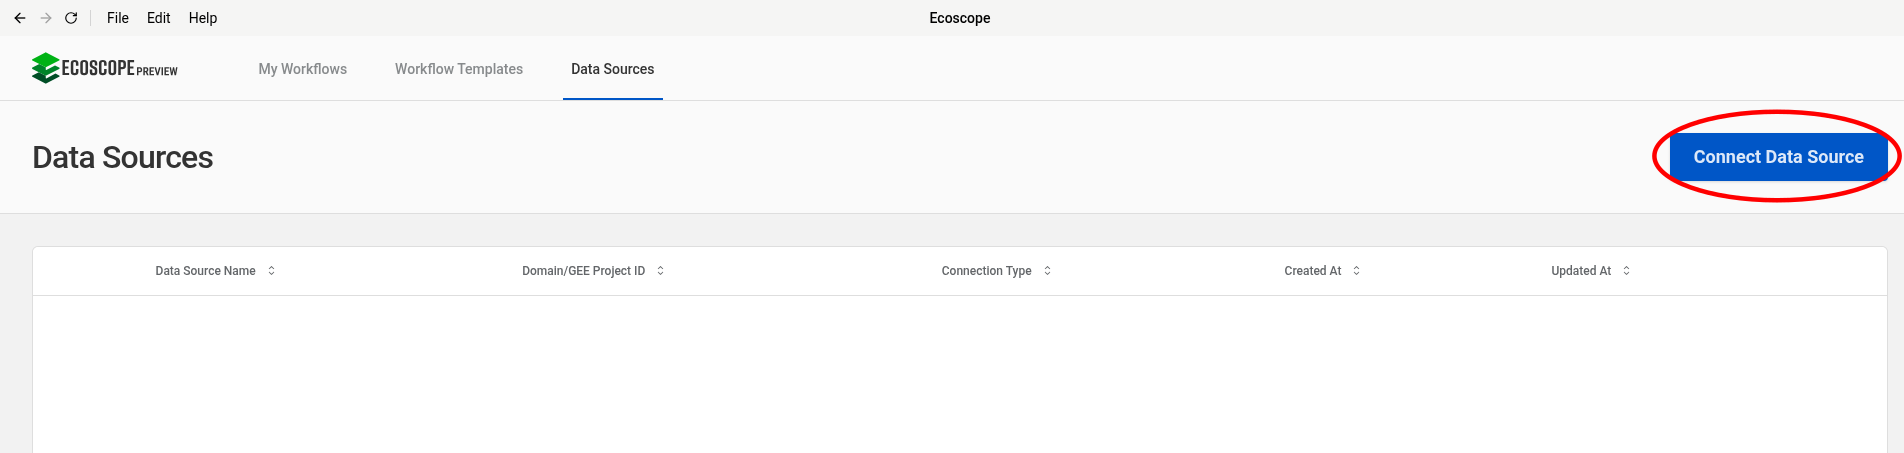
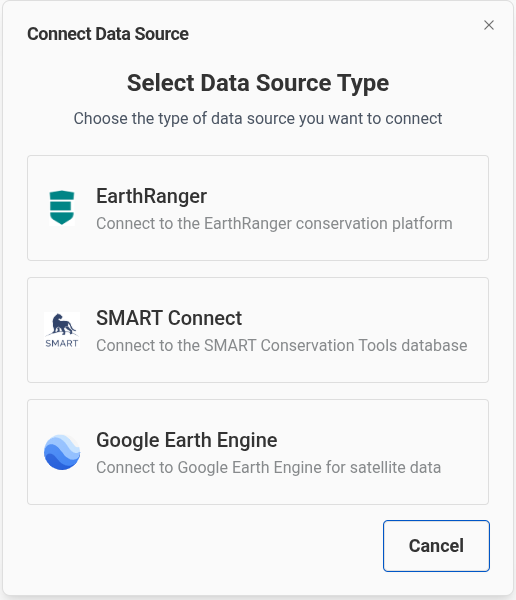
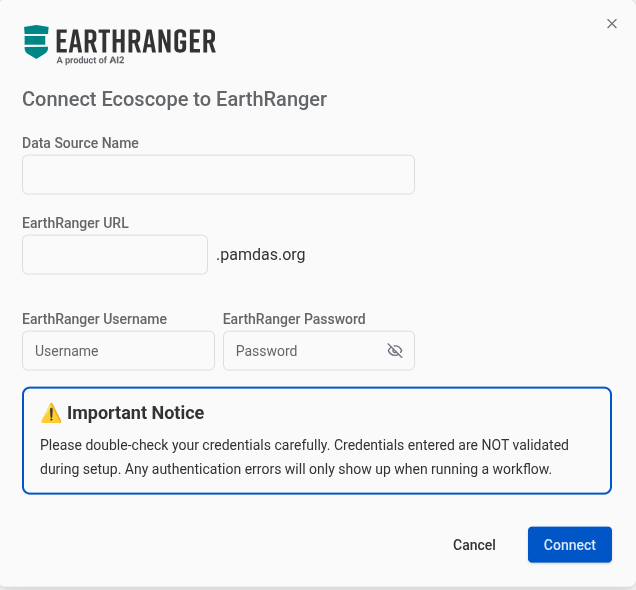
Click Add Data Source and select EarthRanger. Fill in the connection details for your EarthRanger site — you will need the site URL and your username and password for that site.
Configure the workflow
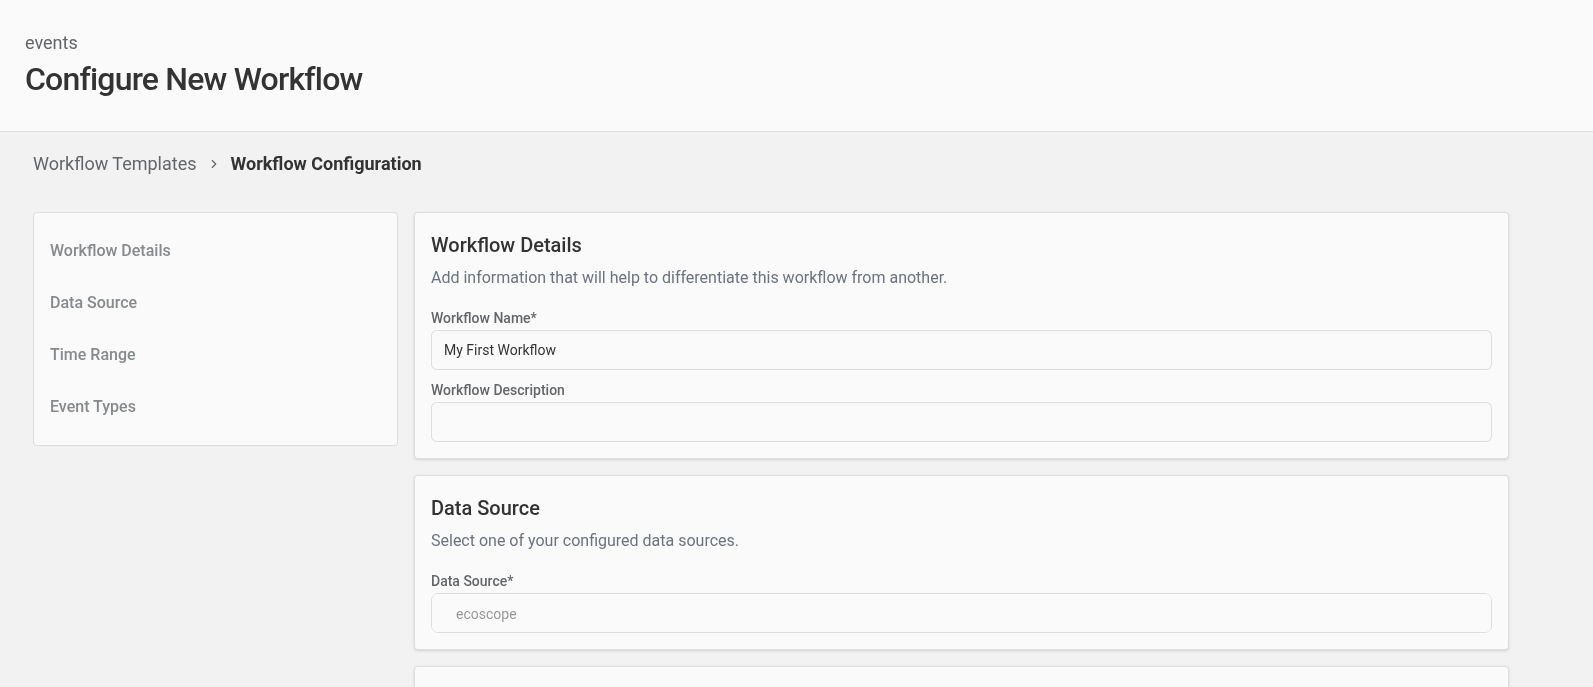
Return to the Templates screen, select your imported template, and click New Workflow. Ecoscope Desktop will present the configuration form — this form is generated from the parameters that are not bound under partial in your spec.yaml.

Select your EarthRanger data source, set a time range, and configure any other parameters that appear. The form fields, their types, and default values are all generated from the type annotations of the registered Python functions used to compose the workflow.
Run the workflow
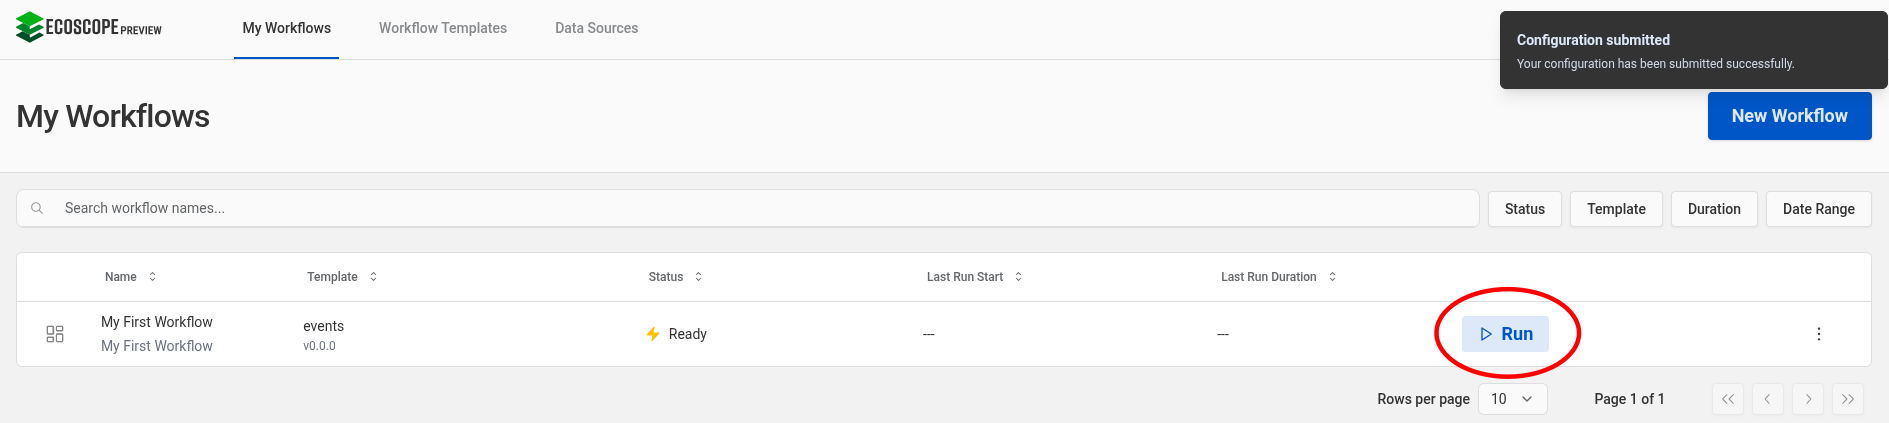
Once you are satisfied with the configuration, click Submit. You will be brought back to the My Workflows table, from where you can click Run. The workflow will then execute. Note that there is no streaming of progress — you will see a running spinner until the workflow completes.
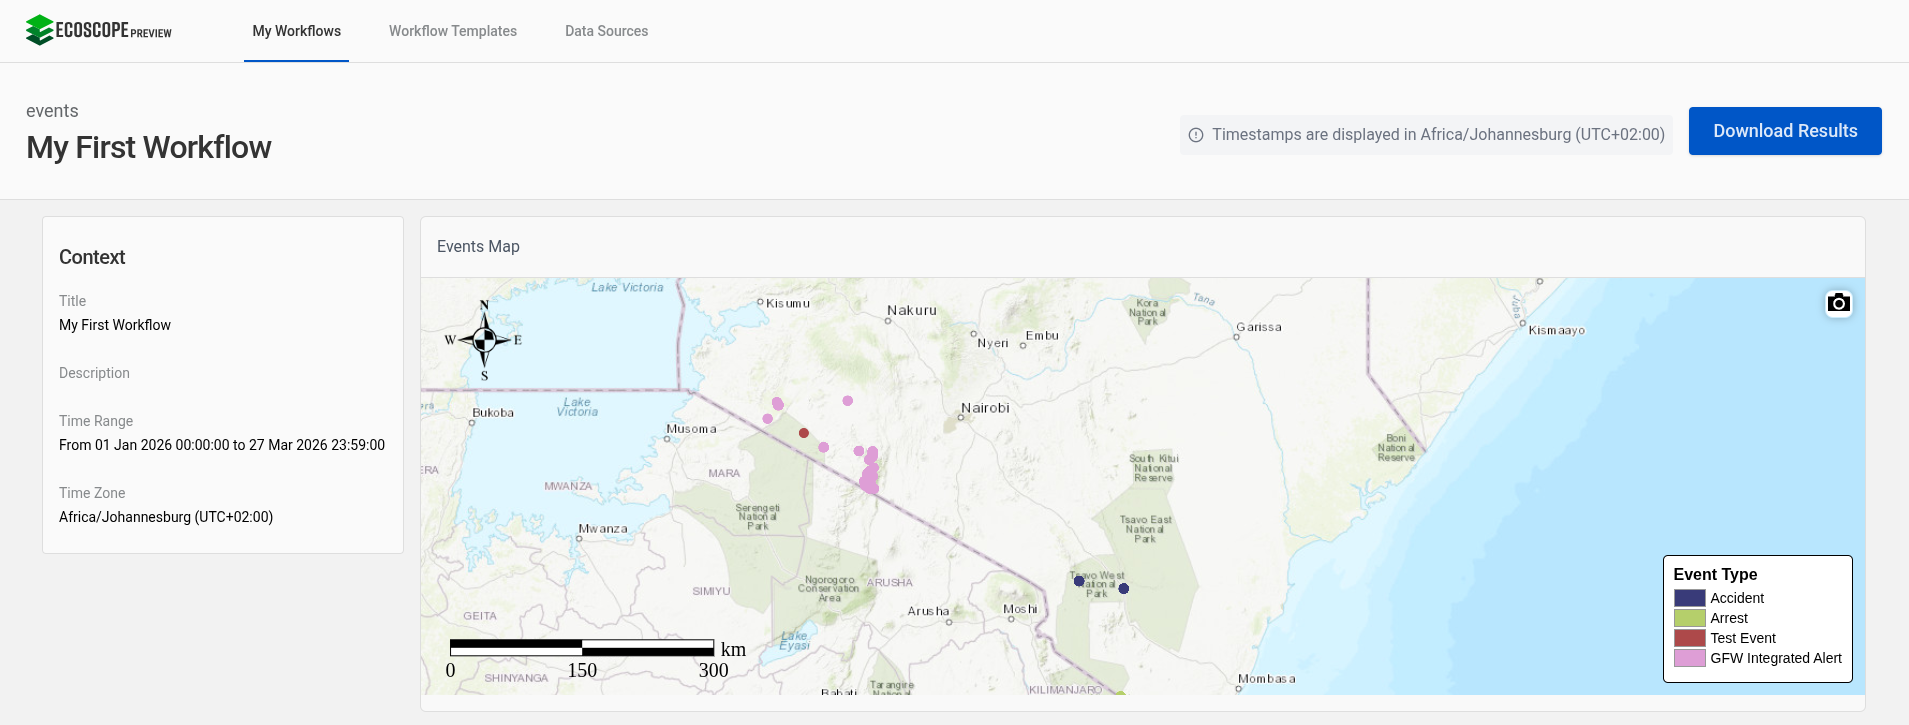
View the results
When the workflow completes, the status will be shown as Success, at which point you may click on the table row for that workflow to see the results dashboard. In this example you will see a single map widget showing event locations color-coded by event type.
Step 5 — Change a parameter, recompile, and re-run
Now you will get your first taste of the iterative workflow development process.
Open spec.yaml in your editor and find the events_colormap task:
- name: Events Colormap
  id: events_colormap
  task: apply_color_map
  partial:
    df: ${{ workflow.get_events_data.return }}
    input_column_name: event_type
    colormap: tab20b                    # ← change this
    output_column_name: event_type_colormap
Change the colormap value from tab20b to Set3:
Now recompile with the --install flag so the compiled package is updated in place:
$ wt-compiler compile --spec=spec.yaml --pkg-name-prefix=ecoscope-workflows --results-env-var=ECOSCOPE_WORKFLOWS_RESULTS --install
Back on the Workflow Templates page in the app, via the kebab menu on the top right of the card for your workflow template, click Delete. Then re-import your workflow via the Add Workflow Template flow covered above, to pull in the updated workflow. Now, you may re-configure and re-run this workflow to see the changed result: the event markers now use the Set3 color palette instead of tab20b as they did initially. This is the development loop in action: edit → compile → run → observe → iterate.
Note
The Delete (vs. update-in-place) flow is a bit cumbersome. We plan to explore ways to smooth this out in a future release.
Next steps
- Understanding spec.yaml — Walk through every line of the spec you just ran, and understand
partial,${{ }}expressions, andskipif. - Tutorials — Learn to write custom tasks, build widgets, configure groupers, and more.
- Examples — Study production-grade workflow repositories.